Mandalas
- What did you notice about the images in the video?
- Where did you see repetition?
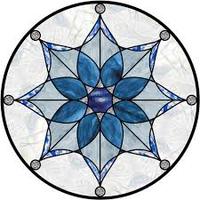
These types of images are called Mandalas. The word mandala means "circle," which represents wholeness. A mandala is a two-dimensional circular shape that has a central focal point. From the central point, a symmetrical design radiates outwards. This is called radial symmetry -- all the sections that radiate from the central point are made up of exactly the same parts. For example, pies, snowflakes, and starfish have radial symmetry.
The book of Genesis tells us, "In the beginning God created..." God created mandalas in nature all around us. A spider's web or a sunflower are great examples. Look at these mandalas found in nature.
Can you think of other examples of mandalas or radial symmetry in nature?
Objective:
In this lesson you will investigate and explore how God uses mandalas (radial symmetry) in nature. You will create a mandala using radial symmetry.
Materials:
6x6-inch white scrap paper, Pencils, colored pencils, markers, sharpies, 12x12-inch white construction paper, Rulers, Compasses or various sizes of plastic lids
Process:
- Read through all instructions first.
- Create a Mandala by drawing Concentric Circles, adding designs, and adding color with markers or colored pencils.
- Take time to practice drawing Concentric Circles with radial symmetry on the 6" x 6" square paper.
- Look at the designs God uses in mandalas found in nature. What designs can you incorporate in your artwork? Practice drawing them within concentric circles on your practice 6" x 6" squares.
- Once you feel comfortable with a design, get your 12"x12" white construction paper and markers or colored pencils to create your design.
- Divide the construction paper into 8 triangular sections. First, using a pencil, lightly draw diagonal lines from one corner to the opposite corner. Second, lightly draw a vertical line in the middle of the paper from one side to the other. Finally, draw a horizontal line in the middle of the paper from one side to the other.
- Using a pencil, lightly draw concentric circles with compasses or trace different size circles using circle templates.
- Go over each pencil line with black marker or black colored pencil.
- Add the rest of your symmetrical designs.
- Begin to fill in the mandala with color. Think about how you will use color. Do you want to use complimentary colors? Analogous colors? Primary colors? Be careful to keep your hands off the colored area while working so the color does not smear.
- Finally, as a class we will discuss and arrange artwork to be displayed.
- You may look at examples done by other FBCS artists.
*You may also want to check out this website: How to Draw a Mandala. DO NOT draw your mandala to look just like the example.
Standards:
VA:Cr2.1
VA:Re7.2
VA:Cn11.1
VA:Pr.4.1
VA:Cr2.1
VA:Re7.2
VA:Cn11.1
VA:Pr.4.1
